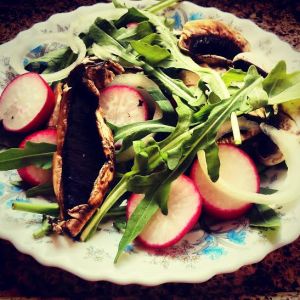
Arugula Mushroom Radish Salad with Roasted Garlic Balsamic Vinaigrette
I couldn’t think of a healthier way to mark my 400th blog entry other than with an easy arugula salad recipe. I also include a roasted garlic balsamic vinaigrette recipe as well. From stacking up on all those carbs and calories from soups, meat dishes, and dairy to desserts, an a unique but easy arugula salad recipe is very necessary. I normally would be content with a fresh crisp garden salad but I always welcome new and creative ideas to spruce a salad up by just a notch. I live on cut-up veggies daily but I wanted to add an exotic twist to my salad. Having not tried arugula in a long while, I wanted to incorporate my own variation in which I subsequently did.
Arugula, or salad/garden rocket, is a nutritious green-leafy vegetable belonging to the Brassicaceae family – cauliflower, kale, cabbage, mustard greens, etc. Sometimes, arugula is referred to it’s scientific name Eruca sativa. Loaded with nutrients and minerals, this vegetable has no shortage of healing properties. Arugula is also a great source of folic acid and vitamins A, C and K. As one of the best vegetable sources of Vitamin K, this leafy vegetable provides a boost for bone and brain health. Arugula is not only great for maintaining a healthy weight but it’s also thought to be a powerful aphrodisiac 😉
Commonly used as a salad green, this aromatic spicy leaf is often mixed in with other vegetables with milder flavors. I sometimes like to counteract the peppery aftertaste of arugula with a roasted garlic balsamic vinaigrette, especially for this particularly easy arugula salad recipe. Other people like to sprinkle Parmesan cheese or mix in goat cheese. Or they sometimes throw in candied chopped pecans. I would have used either option if I had access to any of these ingredients. I also tossed in some mushrooms and radishes as well but you can use any vegetable of your choice. Arugula is not only limited to salads. I may use leftovers for an arugula pesto dressing, dip, or pasta sauce depending on how adventurous I am feeling. I recently used some of them to make an arugula mushroom tortilla pizza for lunch. Scrumptious!
For this recipe, you will need:
- 6 oz baby arugula
- 1 red onion sliced
- 1 cup of chopped or sliced mushrooms
- Handful of baby radishes sliced
For the roasted garlic balsamic vinaigrette recipe, you will need
- 1 head of garlic roasted peels removed
- 4 tablespoons of olive oil
- 2 tablespoons of balsamic vinegar
- Water
- Salt and pepper for taste
Instructions
Place vegetables in a salad bowl. For the vinaigrette, place ingredients in a food processor. While processing, drizzle in some water till achieved the right consistency. Toss gently to coat and serve.
Yields 4 servings
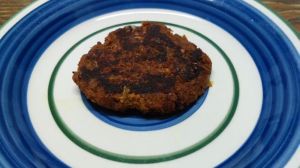
Black Bean Burgers
I am not a particular fan of beans. Beans don’t normally bode well for my digestive system (I will spare you the graphic details). I will avoid chili or any heavily beaned dishes for that matter. I know it seems rather ironic that I am sharing a black bean burgers recipe with you considering my aversion to beans. I made an exception with black beans after hubby made a black bean burrito many dinners ago. Of all beans, I found black beans to be more digestible to me. Other types of beans are like cement to my intestines. I had the least amount of digestive problems prior to eating black beans. Plus I needed a vegan dinner idea and I made black bean burgers on the whim.
After having tried homemade black bean burgers, I found found them to have a satisfying flavor and a robustly meaty texture to them. Even devout carnivorous will appreciate these vegan black bean burgers. The seasoning makes all the difference in the world. Sauteed vegetable add depth to the patties without dominating them. I thought about using raw black beans but took a shortcut by using canned black beans instead. I normally would go for a beef burger but I can delight myself to a vegan option every now and then. Having made veggie burgers/patties before, making these homemade black bean burgers were no challenge at all.
These black bean burgers are simple to make and taste as good as they smell, if not better. Naturally allergy friendly, they can also be made gluten free and vegan too depending on what type of bread crumb or oats you use in this black bean burger recipe. Unlike beef burgers, which are best cooked over extremely high heat, these black bean burgers require a moderate heat so that they can cook through and firm up before the exterior burns. Since the batter does not have any eggs in them, you can taste the mixture and adjust the seasoning to your liking.
For this recipe, you will need:
- 2 cups of cooked black beans or 2 15 oz can of black beans drained and rinsed
- 1 green bell pepper chopped
- 1 onion chopped
- 3 cloves of garlic minced
- 1 flax egg (you can use a regular egg)
- 2 tablespoons of vegan mayonnaise
- 3/4 cup of panko bread crumbs, corn flakes, or oats
- 1 teaspoon of chili powder
- 1 teaspoon of cumin
- 1/2 teaspoon of ground chipotle chili or smokey paprika
- 2 teaspoons of chopped cilantro or parsley
- Salt and pepper for taste
Instructions
Saute vegetables in a large skillet over medium high heat till tender. Transfer vegetables and beans to a food processor. Add seasoning and process till smooth. Transfer black bean mixture to a bowl and add mayonnaise, flax egg and crumbs. Season with salt and pepper. Mix well and form patties. Heat 1 tablespoon oil in a large non-stick or cast iron skillet over medium heat until shimmering. Add patties but don’t overcrowd the skillet. Cook for 4-5 minutes on each side until browned and crisp. Serve immediately or freeze leftovers.
Yields 4-6 servings
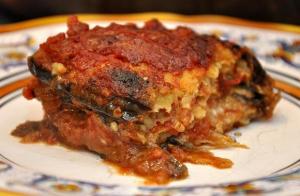
Low Carb Gluten-Free Lasagna
We are both suckers for lasagna. Rich, creamy, and comforting, what’s not to love? Lasagna is on the top of hubby’s favorite dishes. But we have been both watching how much pasta we eat and spend on since lasagna noodles are a bit on the pricey side. That is why we seldom have lasagna for dinner. For some reason, I couldn’t ignore my craving for lasagna. Eggplant was the perfect solution for a low carb dinner idea. It took some convincing for hubby to be on board with the idea of using eggplant in lieu of noodles. He eventually came around. Most people I know are very fussy over heavily eggplant dishes but thankfully there weren’t any complaints. In fact, I earned a lot of approval with this gluten free lasagna version and therefore I am delighted to share my eggplant lasagna recipe with y’all 🙂
Even if you normally don’t like eggplant, I am hoping that this eggplant lasagna recipe is exceptional. I’ve had other gluten-free options but rice, corn, quinoa, and buckwheat pasta is expensive – even more so than regular pasta. And they are not readily available at my local health food stores. If you have a serious aversion to eggplant, you can use other gluten-free alternatives. I ,however, am trying to watch my waistline and felt I had more than my fair share of carbs for this week. This gluten free eggplant lasagna dish is satisfying but not too heavy. It comes close to what you would expect from a authentic classic Italian lasagna but without the excess amount of carbs. If you want a vegan option for this eggplant lasagna recipe, you can omit the cheese entirely or use a vegan substitute.
If you are trying to encourage your kids to incorporate more vegetables in their diet, this eggplant lasagna recipe is the perfect solution. Eggplant or not, who doesn’t love a home-cooked lasagna? What difference does it make which preparation method you decide to use when making lasagna? Even though eggplant hasn’t entirely replaced pasta for me, it’s a healthier substitute. I desperately wanted to have some lasagna and I didn’t regret using eggplant instead of pasta. Don’t judge me 😉
For this recipe, you will need:
- 2 eggplants sliced 1/4 ” thick
- 4 tablespoons of olive oil divided
- 1 onion chopped
- 3 cloves of garlic minced
- 1 carton of mushrooms sliced
- 1 package of fresh spinach stems removed
- Marinara sauce (you can make your own to monitor the sodium content)
- 2 lbs of ground meat of your choice (I used vegan ground beef as it cooks faster)
- 15 ounces of low fat ricotta or cottage cheese of your choice
- 1 cup of grated Parmesan cheese
- 1 cup of skim Mozzarella cheese
- Salt and fresh ground pepper
Instructions
Preheat oven to 350 degrees F. Place sliced eggplant in on a baking sheet. Lightly brush eggplant with olive oil and season with salt and pepper. Roast in the oven for 10 minutes or until tender. Add the remaining 2 tablespoons of olive oil in a skillet over medium high heat. Add onions and saute till translucent. Add minced garlic and saute for another two minutes. Add the vegetables and saute until tender. Add the ground meat and sauce and cook for 5-10 minutes. Mix Parmesan cheese and ricotta cheese in a separate bowl. Layer the lasagna in a greased baking dish in the following order: sauce, cheese mixture, eggplant, cheese mixture, sauce and then top with Mozzarella and cheese. Bake for 30 minutes or until bubbly.
Yields 10 servings
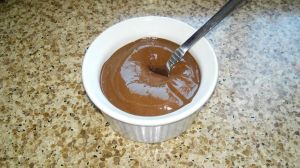
Copycat Swiss Miss Chocolate Pudding
My introduction to pudding was very cold and brief. It was not love at first sight. It’s slimy texture was far from appealing to me. Then I had a change of heart when pudding became my consolation after I had my braces slapped on to my teeth. I literally couldn’t eat solid food for nearly two weeks. My mother would stock up on pudding among other things. Swiss Miss pudding was my favorite brand. They were inevitably devoured shortly after they filled up the refrigerator. Only then did I regret having preconceived notions against pudding.
While I enjoyed eating pudding, making pudding seemed intimidating and painstaking. Only this one time did I bother to make pudding from scratch following a recipe, of course. It was my final time. Never did I struggle to temper the egg mixture. It was a scrambled epic failure. I ended up making what I can best describe as scrambled eggs in chocolate. Yummy. Subsequently, I had to toss it in the bin along with the illusions of mastering in making pudding. Even this incident would make Amelia Bedilia seem less catastrophic. Luckily, I only made one serving worth of pudding before it was qualified as a waste. I then stuck to just eating pudding and not causing further damage to my pots and pans.
My hankering for pudding returned after being dormant for a while. Swiss Miss pudding is not available where I live and I find the brand that my local store carries to be too sweet. Then the idea of learning how to make vegan chocolate pudding crossed my mind. I am very eager to share this healthy chocolate pudding recipe with you because it’s rich, silky, decadent and most importantly, super easy to make. Plus, I added my own twist. Only this time I did not encounter a kitchen disaster when making this vegan chocolate pudding. This healthier version has everything you can expect from a Swiss Miss chocolate pudding but without the eggs, cream, and sugar. All it takes is blending all the ingredients in a food processor and voilà! No more burnt pots. No more scrambled puddings. While this healthy chocolate pudding may seem like child’s play, the verdict is worth the lack of effort. And I am all about damage control in the kitchen. Thankfully, my kitchen disasters have been minimal.
For this recipe, you will need:
- 1 ripe avocado, skin and seed removed
- 1 large ripe banana peeled
- 1/2 cup of unsweetened cocoa powder sifted
- 1 teaspoon if vanilla extract
- 1/4 cup of pure maple syrup or agave nectar (you can add a bit more for desired sweetness)
- 1/2 plus more of cup of freshly squeezed orange juice or low fat milk of your choice
- 1 teaspoon or orange zest (optional)
- 1/2 teaspoon of instant espresso powder (optional)
- 1/4 teaspoon of cinnamon (optional)
- Pinch of salt
Instructions
Place all ingredients in a food processor or blender and blend till smooth. Add a bit more liquid as needed for desired consistency. Spoon the pudding into ramekins or bowls, cover and chill in the refrigerator until ready to serve. Top with chopped walnuts if you like.
Yields 1 1/2 – 2 cups
Pan Seared Sea Bass
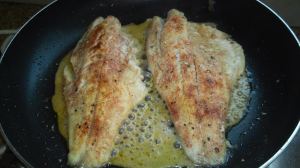
I don’t have sea bass that often. When I do, I utilize this fish to its maximum. As one of my favorite and one of the most expensive fish, I try to make the most of my money. What do you do when you need to impress guests or growling stomachs? I recently made this succulent mouthwatering pan seared sea bass – a truly fine catch. I actually owe hubby for the inspiration as it was he who suggested sea bass to me. The meat on the sea bass is very fleshy and eat bite literally melt in your mouth. I like to drizzle some fresh lemon juice over this buttery fish. This method enables the acidity to break up the grease and add an additional dimension to the flavor.
This sea bass recipe is not as complicated as it looks. The magic behind this recipe is the seasoning and the perfect sear. As elegant as this pan seared sea bass dish seems, the preparation and cooking is a cinch. Gourmet dishes don’t have to be labor intensive. Cooking fish requires attention to detail and a lot of care. There is nothing that irks me more than overcooked dried fish. Overcooking a sea bass is one of the worst sins you can transgress when it comes to cooking fish. It would also be a waste of your effort and money. All I really did was season the fillets with salt, pepper, paprika, cumin, onion powder and garlic powder with a lot of TLC. Then I added little finishing touches with some fresh herbs and lemon juice.
For this recipe, you will need:
- 2 sea bass fillets
- 1/3cup of mixed fresh herbs chopped
- 2 tablespoons of olive oil
- 1 teaspoon of onion powder, garlic powder, cumin, and paprika
- Lemon juice
- Salt and pepper for taste
Instructions
Pat fillets dry and score just through skin in 4 places. Diagonally cut each fillet in half and season with paprika, cumin, onion powder, and garlic powder. In a heavy skillet heat oil and over moderately high heat until foam subsides and sear fish, skin sides down, about 3 minutes, or until skin is golden. Turn fish over and cook 2 minutes more, or until just cooked through. Remove skillet from heat and stir in lemon juice and herbs. Season with salt and pepper. Spoon sauce over fish and serve.
Yields 2 servings
Chilled Spiced Peach Mango Soup
Hot summer days like today beg for a chilled fruit soup recipe. Since mangoes and peaches are at their peek this season, I decided on a chilled spiced peach and mango soup. I’ve been through many chilled fruit soup recipes and nothing pleases the palate more than a bowl of chilled refreshing fruit soup. I am already approaching that stage where I limit my use of stoves and ovens. The idea of sweating in the process of preparing meals does not appeal to me in the least. Yes we tend to be more stagnant when the temperature is hotter but I don’t make chilled fruit soups just for the mere convenience – I happen to love fruit soups (and I love taking shortcuts as well).
I also happen to love fresh peaches and mango – together or on their own. I routinely serve a hot bowl of soup but the weather changed my plans for me and not necessarily in a bad way. This chilled spiced peach mango soup was very appropriate for this season. A hint of chipotle seasoning lifts the flavors of this chilled fruit soup recipe. If you can’t find chipotle seasoning, you can use chili powder as well.
This gluten free chilled spiced peach mango soup recipe can double as healthy smoothie to be eaten as breakfast, lunch or a snack. It also makes for a wonderfully refreshing appetizer. Leftovers can be reserved for making frozen yogurt or sorbet. It takes a peach and a mango to tango with this zesty, aromatic, and vibrant chilled soup. With the bright colors of the peaches and mango, you’ll feel the zing of energy you need to keep yourself fueled throughout the day. Have fun playing around with different fruits you love but don’t leave out the ginger. Ginger assembles all the flavors together, not to mention the health benefits it provides.
For this recipe, you will need:
- 4 ripe peaches peeled and pitted
- 2 ripe mangoes peeled and pitted
- 2 cups of coconut water or milk of your choice
- 2 teaspoons of fresh minced ginger
- 1 teaspoon of chipotle or chili powder
- 1/2 teaspoon of dried cardamon
- Low fat plain yogurt of your choice
- Fresh mint leaves for garnish (optional)
Instructions
Place first 6 ingredients in a blender or food processor and blend till smooth. Dollop yogurt on each bowl of soup. Garnish with fresh mint leaves if you like. Serve chilled. Enjoy!
Yields 4 servings
Onion Garlic Parmesan Rolls
A dinner is incomplete without warm fresh dinner rolls. I very seldom bake and serve dinner rolls but I was veering towards freshly baked onion garlic Parmesan rolls to go with a soup I had made. Plus I had a surplus of fresh Parmesan cheese. The inspiration behind this particular Parmesan dinner roll recipe came from a batch of buttery dinner rolls that a friend baked and served at a meal weeks ago.The rolls were incredibly soft and rich, I was yearning for some more. But rather than using an excess amount of butter, I used Parmesan cheese in these rolls flavored with a bit of onion and garlic.
As reiterated before, I don’t make bread or rolls that often primarily due to the lack of time. When I miraculously dedicate some time to make them once in a blue moon, it is a special treat and they don’t last around long enough to be immensely enjoyed to the fullest. Plus I have my waistline to consider but I will splurge from time to time when I feel I have earned it. I absolutely love baking bread and related goods. I enjoy working with flour and yeast. At first, I thought baking bread was tedious and too labor intensive. The longer I have been working with these ingredients, the more my attitude towards bread baking started to evolve.
I am very particular towards my homemade breads. I can’t get enough of their yeasty goodness. I find baking with flour and yeast to be very relaxing, therapeutic, and satisfying – all which are abruptly negated by the very dizzying, stressful, and tension-inducing moment when I realize the exuberant mess I created from baking rolls and all sorts of bread. Thankfully, these moments are not that frequent as I try to keep the mess to the bare minimum. I’ve learned to be very neat and organized in my kitchen but not all mishaps are avoidable.
Every bite of these rich, delectable, flavorful onion garlic Parmesan dinner rolls were worth the aggravation and mess. And when I complained about nearly going insane from having a lot of Parmesan cheese earlier? I take that back. Now I have to run out and buy more Parmesan cheese from using all of them up on these dinner rolls. I will hold my tongue before I gripe about having too much cheese in the house (so long as they have not reached past their expiration date as spoiled cheese or anything dairy is a pet peeve of mine).
For this recipe, you will need:
- 2 teaspoons of active dry yeast
- 2 tablespoons of granulated sugar divided
- 1/2 cup of warm water or low fat milk
- 1 cup of whole wheat bread flour or spelt flour
- 1 1/3 cup of bread flour
- 1/4 cup of olive oil
- 6 tablespoons of Earth Balance butter
- 1/2 teaspoon of salt
- 1 head of garlic roasted and peels removed
- 1 onion chopped and caramelized
- 1/2 cup of shredded and grated Parmesan cheese (leave some aside to sprinkle on top of rolls)
Instructions
In a small mixing bowl, combine the yeast, 1 tablespoon sugar, and milk/water. Give a stir and set aside for 5-10 minutes allowing the yeast to bubble. In another bowl, combine flours with salt and the remaining tablespoon of sugar. Mix yeast mixture in the flour. Place onions, garlic, butter, and oil in a food processor and process till smooth. Fold the onion garlic mixture into the dough. Add the Parmesan cheese. Mix and knead the dough on low speed with a dough hook, if using a mixer, for up to 3 minutes. Let the dough rest for 15 minutes, covered. This method allows the dough to gain more strength and elasticity. Divide the dough into 12 rolls. Place rolls in a greased muffin tin. Brush top of each roll with olive oil. Sprinkle top with Parmesan cheese, a bit of garlic and onion powder if you like. Place rolls in a draft-free zone and allow them to rise for 35 minutes or until doubled in size. Preheat oven to 375 degrees F. Bake for 25-30 minutes.
Yields 12 rolls
Mediterranean Meat Pockets
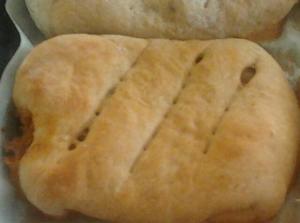
Hubby has had a craving for red meat. I very seldom share meat recipes because I don’t make meat dishes that often. Not because I am a vegetarian. Non-meat dishes are just more convenient for me to make but I am always willing to bend over backwards for people I love and care about. I honored Hubby’s request for a beef dish by making homemade meat pockets for him which he immensely enjoyed. Since I am about to go meatless for the next 9 days, I thought it would be appropriate to share my meat pockets pie recipe for this one last time (at least for a while).
It is a Jewish custom not to eat meat or drink wine among other things in the 9 days leading up to Tisha B’av – anniversary of the destruction of both temples as well as numerous tragedies that followed. I may not be a vegetarian but I never complained about forgoing meat for a couple a days. In fact, I found it somewhat to be relieving. While I don’t eat meat as often as I used to, I do make special exceptions. Having overused ground beef for Shepherd’s Pie, Sloppy Joe’s, and burgers, I was in need of a different option and I settled on meat pocket pies.
Learning to cook meat pockets was not much different than making meat knishes or calzones. The concept and techniques are similar. They consist of a meat filling and a bread exterior. Only this time, I infused some Mediterranean flavors in these homemade meat pocket pies. As far as filling options are concerned, the sky is the limit. You can pull your own twist. I know many of you are not heavy meat eaters so a vegan option is always available to you. Just simply swap the meat for the vegan version and you will still get a satisfying and flavorful meat pocket pie – a meatless dinner idea I would consider for the next 9 days.
For this recipe, you will need:
- Pizza dough recipe
- 1 lbs of lean ground beef
- 1 onion chopped
- 2 cloves of garlic minced
- 1 eggplant thinly sliced and cubed
- 1 zucchini thinly sliced and cubed
- 2 bell peppers diced
- 1 teaspoon of cumin
- 1/2 teaspoon of chili powder
- 1/2 teaspoon of cinnamon
- 1/3 teaspoon of turmeric
- 1/4 teaspoon of ground coriander
- 25 oz. can of crushed tomatoes
- Salt and pepper for taste
Instructions
Follow instructions for pizza dough recipe. Divide dough into 6-8 pieces. Heat 2 tablespoons of vegetable or olive oil in a skillet over medium heat. Add chopped onions and saute till translucent. Add minced garlic and saute for another 2 minutes. Add the vegetables and cook till tender. Stir in the ground beef and cook till browned and crumbly. Drain excess fat from the pan and stir in spices, salt, pepper, and crushed tomatoes. Bring to a simmer, cover, and cook until the liquid has evaporated.
Line baking sheets with parchment paper. Roll out dough pieces into discs. Fill each disc evenly with beef mixture in the center. Seal dough with opposite ends. Arrange on baking sheets. Allow them to rise for 20 minutes or until double the size. Preheat oven to 400 degrees F. Bake until golden brown and hot on the inside, about 25 minutes.
Yields 6-8 large meat pocket pies
Soy-Free Vegan Raw Cheesecake
No-fuss elegant delectable desserts are my favorite to make – no-bake desserts specifically. It’s not just because I am lazy or pressed for time (even though I frequently finding myself in these circumstances; I blame the heat). I may have used this proverbial quote before but I will reiterate it again: If you can’t take the heat, stay out of the kitchen. In my case, I can’t stand the heat but won’t let it chase me out of the kitchen. With this soy-free vegan raw cheesecake that I recently made, I remained in my kitchen without the heat.
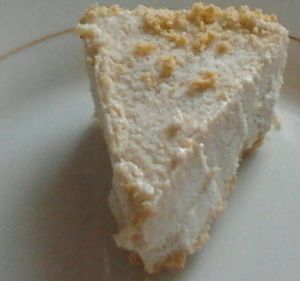
I’ve had my fair share of raw desserts before and even made some myself. Raw cheesecake was a novelty to me, especially a soy-free version. Many people I know are not particularly fans of soy oriented dishes and desserts so I wanted to share a dessert idea that both vegans and non-vegans can compromise on and mutually enjoy. Unless you have a nut allergy, you will appreciate this raw cheesecake recipe regardless of your dietary orientation. I, for one, love nuts. That is why I was devastated upon recently discovering my allergies for chestnuts and pine nuts. I pray hope that more onset nut allergies won’t follow. Thankfully, I can still eat cashews, almonds, and macadamia nuts – ingredients I used in this no-bake raw cheesecake recipe.
When I served this raw cheesecake to guests, they had a hard time believing that I used nuts instead of Tofutti cream cheese. I like using cashews and macadamia nuts in my desserts primarily because they are versatile, creamy, and lovely tasting. I very seldom use macadamia nuts because they are very expensive so I alternatively used almonds instead which gave this raw cheesecake a ricotta cheesecake texture. With this raw cheesecake, it’s almost like biting into a slice of a New York style cheesecake minus the high fat content from the cream cheese and sour cream. Even a small slice is extremely satisfying and will give you a comfortable feeling of fullness without weighing your stomach down. You can enjoy a dessert that is equally exquisite, rich and gourmet without tacking on the extra calories. If you enjoyed my nut cream recipe, you will rave over this raw cheesecake recipe. Hassle-free and easy to make, this soy-free, no-bake vegan raw cheesecake is perfect for beginners consisting of only 6 ingredients excluding the pie crust! This recipe is practically fool-proof. In fact, I will be very impressed if you manage to screw this recipe up.
For this recipe, you will need:
- Prepared pie crust
- 2 1/2 – 3 cups of cashews, macadamia, or blanched almonds
- 1 tablespoon of vanilla extract
- 1/2 cup of pure mayple syrup, agave nectar or honey
- 1/2 cup of coconut butter melted
- Juice and zest from 1 lemon
- 1/8 teaspoon of salt
- 1/4 cup of water plus more for soaking nuts
Instructions
Cover nuts in a bowl and let it soak for 8-12 hours or overnight. Drain. Combine all the ingredients for the cheese filling a food processor or blender and process for 6 minutes or until completely smooth. Pour contents into prepared pie crust then cover and freeze till ready to use. Remove cheescake from freezer 5 minutes before serving. Store in freezer up till 2 weeks.
Yields 8 servings
Oven Baked Chicken Fire Poppers
As the weather gets hotter, so does my appetite for spicy food. The craving for spicy chicken nuggets or any chicken with a spicy ingredient has been tormenting me for weeks until I finally capitualted when I decided that fighting my hankerings is a losing battle. Only this one time have I decided not to cry over this big defeat. Who can resist these bite sized yumminess? The tingling flavors from the hot sauce always have me in a headlock. I grew up on chicken nuggets. They were a favorite as well as one of the most popularly ordered appetizer on the menu. The piquant flavors from the hot sauce and honey is what makes these chicken nuggets popping – that is how they were dubbed chicken fire poppers. Each bite is explosive but not overwhelming. You couldn’t expect a more perfect balance of flavors. I made sure to make and pack extras for our journey through Europe to America.
This chicken nugget recipe is inspired by a similar recipe using chicken wings. Since chicken breasts are a healthier option, I went with them instead. I also oven baked these nuggets rather than deep frying them. You can achieve the crispy exterior without using copious amounts of oil. A greasy mess is the last thing I need. The only danger factor that lies within these chicken fire poppers is that they are extremely addictive – once you start, it’s hard to finish. Delicious doesn’t even begin to describe these chicken fire poppers. Forget the main course. A basketfull of these spicy chicken nuggets is a meal unto itself but not complete without a salad. I normally have my limits but I bear no shame for my addiction to chicken fire poppers. I suppose it’s a good thing that I show enough restraint not to make them very often. These chicken fire poppers are a new favorite appetizer in my household and that is why I save this chicken nugget recipe for special occasions. I nearly forgot to mentionthat these tender chicken nuggets are easy to make.
For this recipe, you will need:
- 1 1/2 – 2 lbs of chicken breasts cut into 1 1/2-inch pieces
- 1/2 cup of hot sauce
- 1/4 cup of honey
- 2 tablespoons of soy sauce
- 1/2 cup of all-purpose flour or corn starch
- 1 cup of panko bread crumbs or cornflakes
- 1/2 teaspoon of garlic powder
- 1/2 teaspoon of onion powder
- 1/3 teaspoon of cayenne pepper
- 1/4 teaspoon of fresh ground pepper
Instructions
Preheat oven to 375 degrees F. In a bowl, whisk hot sauce, honey, and soy sauce. In another bowl, combine breadcrumbs/cornflakes with garlic powder, onion powder, cayenne pepper, salt and pepper. Dredge chicken pieces in cornstarch/flour. Then dunk them in hot sauce mixture. Coat them with breadcrumbs/cornflakes. Line nuggets evenly on a greased baking sheet. To get a crunchy topping, spray nuggets with cooking spray. Bake for 20-25 minutes.
Yields 4-6 servings
